Height Measurements with PGE 7
Introduction
Photo GPS Extract 7.0 introduced a new feature that allows you to measure the
heights of objects in your photo. This article describes how you can use this
functionality.
The basics
Although the measurement of heights might sound like a very complex thing to
do, it actually is relatively easy. In order to calculate the height of a remote
object we need some input data:
- The distance between you and the object. This distance is calculated
from the GPS positions of you and the remote object. Your own
position is known because the GPS-data is stored in your photo. The position
of the remote object is known because you have to select its position on the
Google Maps.
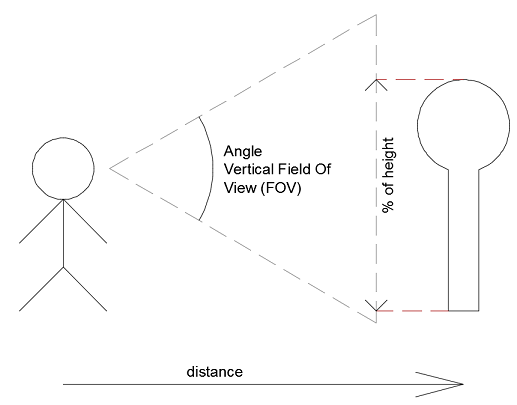
- You are having a photo of an object. This photo was taken with a
camera with a specific lens. This lens has a specific viewing angle (Field
Of View). You have a horizontal and a vertical viewing angle. The viewing
angle can be calculated from the focal length value, which is also stored
inside your photo.
- We need to tell the software the vertical starting/end points of the
object to be measured. This is done by marking these points on a preview
image of the photo. It lets the program know the height of the object as
a portion (percentage) of the total image height.
Using some trigonometry, we now can calculate the total height of the image
at a distance d from the camera. But our object to be measured only spans a
certain portion (percentage) of this height. By using the rule of three we can
calculate the actual height of the object.
Practical usage
Follow the next steps to do your own height measurements:
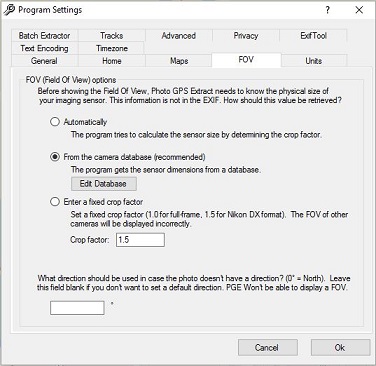
- Make sure Photo GPS Extract is setup so it uses the
camera database. You can check the setting under File → Program
Settings → FOV. (You only need to check this once).
- Open Photo GPS extract and load a photo of the object you want to calculate
the elevation for.
- Very important: Make sure the displayed marker for the camera position is
correct. If the displayed position is not accurate enough you can move the marker
manually by right clicking it. Then select modify → move position. You will
now be able to drag the marker across the map. Drag it to the correct location.

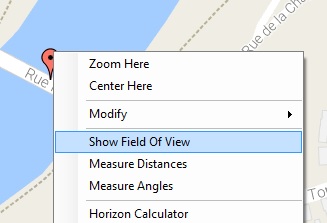
- Display the FOV (Field Of View) for the selected marker. You can do this by
right-clicking the marker and select "Show Field Of View".
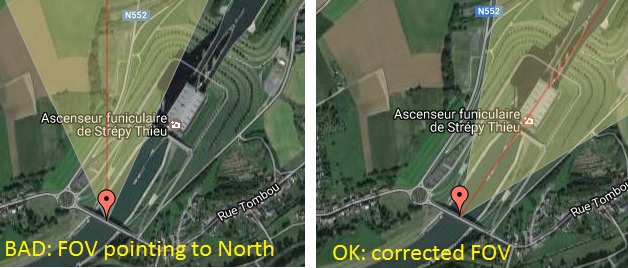
- The FOV should point towards your object to be measured. This might not be
the case because many cameras do not record compass/direction information. You
can set the direction of the FOV yourselves by right-clicking it and selecting
"Adjust Direction".
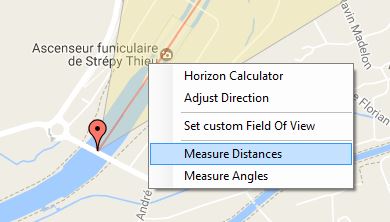
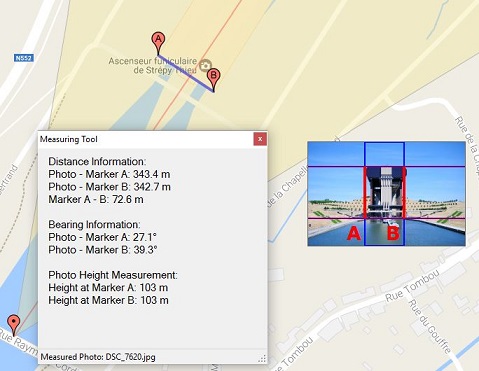
- Right-click the displayed FOV and check "Measure Distances". Now you need to
click the two corners of the object to be measured. This way the program can
calculate the distance between the camera and the object to be measured.
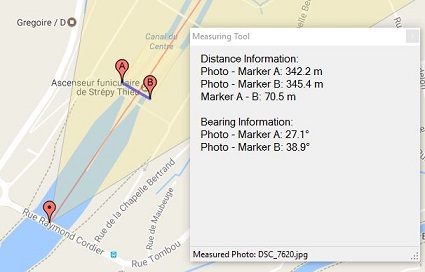
- Make sure the image preview is enabled. You can enable it from the menu
View → Map Extra's → Preview Image. The image previewbox will now appear.
It will already indicate the location of the markers A and B.

- Right-click the image preview and enable "Enable Height Measurements" from
its context menu.
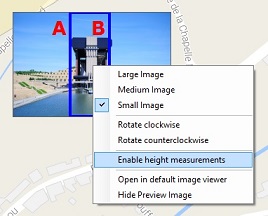
- Now place two horizontal measuring lines in the previewbox by left-clicking
the positions that correspond with the top/bottom of the object to be measured.
You can fine-tune the positions by dragging them further.
- DONE! Photo GPS Extract will now calculate the height of the markers A and B.
Limitations
Do not expect miracles from this feature, it is indicative at best. As I
wrote earlier, this feature depends heavily on trigonometry. It will perform best
for very high distant objects.
- The system uses the GPS coordinates from the EXIF. These GPS coordinates are
often inaccurate and might be "off" for 50 meters or more.
- The focal length in the EXIF might differ from the actual focal length. A
zoom lens is a mainly a (precise) mechanical device. It has a 'sensor' that can
convert the mechanical position into a digital value (focal length). It might not
be completely accurate. It could record a focal length of 19 mm, while the true
focal length was 20 mm.
- The position of the remote object is determined by picking it from a Google
Maps. There is no guarantee this position absolutely correct.
- You need to use this feature on unaltered pictures, it does not work on
cropped photos.
Calculation of the FOV / Camera Database
This function will need to calculate the field of view (angle) of the image
to be measured. There is a simple mathematical formula to calculate the focal
length into this angle, but the formula requires the physical dimensions of the
sensor inside your camera. Unfortunately this information is not stored inside
the Exif-metadata.
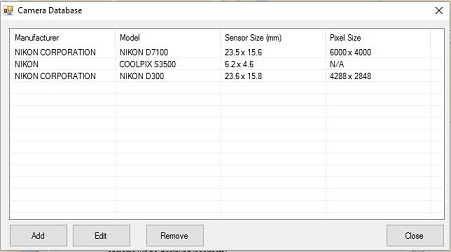
For this reason, Photo GPS Extract 7 comes with a camera sensor database.
It can keep the sensor specifications for all kind of cameras. By default, the
database is empty because I can't possibly maintain a list of any camera ever
constructed.
If you try to open a photo from a camera that is not in the sensor database,
Photo GPS Extract will suggest to create a new database entry. You just need to
enter the sensor details, which can be found in the manual of your camera.
So if you want to use this height-measurements feature, you will need to modify
the program settings so it uses the camera database. By default the database is
not enabled.
